
It’s time for some new art in our bedroom, but spending a lot of money for it isn’t too appealing. But. I found budget art and I’m going to share it with you.
Because. I love it.
I recently shared some free art I found online, printed it off, used a frame I had and cheered up my coffee bar. Not only budget art, FREE art!
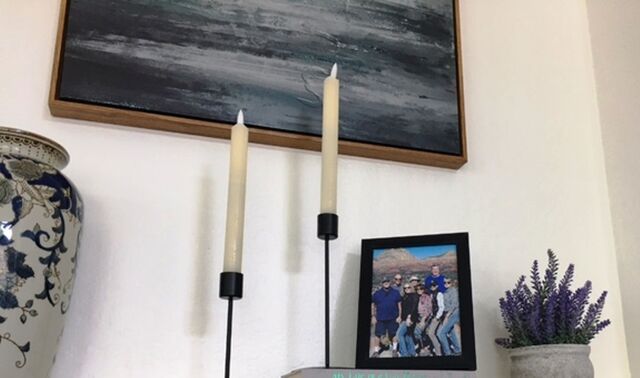
Lately I have been loving the moody art that is popular now. I found a picture that marries the blue and black in my family room. Then my dear friend Chris sent some pics from our Sedona visit and it fit in perfectly. Now a gift of framed pictures is really budget art!
The bedroom has really suffered from hand-me-down art. Summer bedding (finally) went on our bed last week so it felt like time to start changing out the art too.
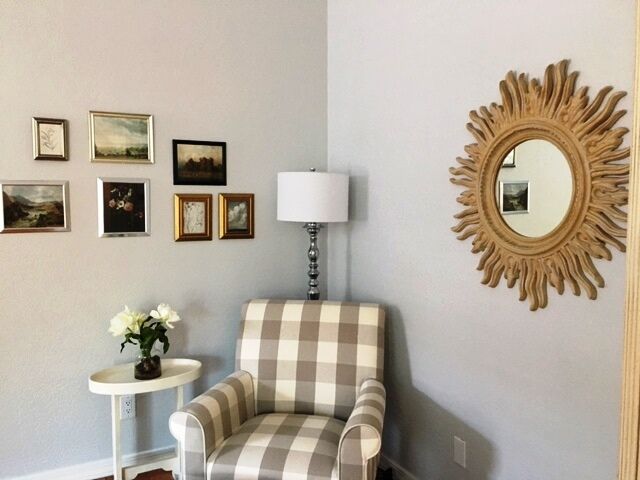
Here is a picture of what I had up before. Which is also budget, BTW.

Wall Art Gallery
Amazon has some gorgeous prints in various sizes for a wall gallery. The Vintage Modern Farmhouse set of seven pictures is what I selected.

Honestly, the pictures are so pretty, I wish they were bigger so I could gaze at them better.
They are a mixture of landscapes, botanical drawings and lovely meadows. Since they are curated, there was no guess work to see if they worked together.
The online example has them displayed perfectly, so I basically copied their layout.
Frames
Since I’m on a budget, the first thing I did was to shop my house. I have a lot of 5×7 frames, but couldn’t find any 8×10. And my 5×7 weren’t exactly what I was looking for.
Rub ‘n Buff to the rescue. A very small tube of that stuff goes a really long way. I linked it on Amazon, but we got ours at Michaels. I think Walmart may carry it too.

We have used it on a couple of projects and still had enough to turn light wooden frames gold. And a very dated metal frame into solid gold.
My second search took me to Rusty’s (my favorite local thrift store). As is the case with thrifting, it’s hit or miss. Nothing there worked.
So, the Dollar Tree it was. I picked up the 8×10 frames I needed. They are really sort of terrible and cheap frames and if you touch them too much they will break.
In fact, one broke coming out of the plastic wrapper and we had to return it.
But, on the wall they look fine. And I’m not touching them. Except to dust them, of course.
Layout
As I mentioned, I wanted to use the same layout I saw online, but I needed to see the pictures in one spot before I got to hammering nails in the wall.
I laid them out on the bed and took a ruler to get spacing right. And then. You guessed it. Roxy needed to assist. In fact, she has assisted on most of this project.
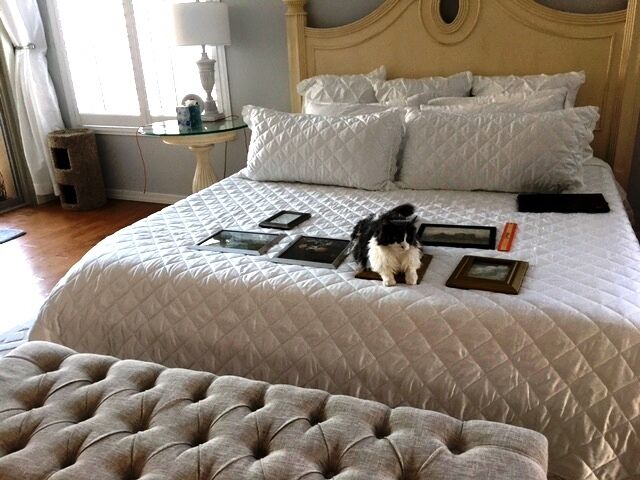
Hub helped out with measuring on the wall and using the level to keep things straight.
Problem
And then. The frames are either cheap or are made to sit on a tabletop so they were popping off the wall. And they wouldn’t stay straight.
They looked awful. I needed another rescue! Luckily, I had purchased Quake Hold and had it on hand. It’s like a bit of putty you can secure your valuables down in earthquake prone places. Or you can secure your pictures to the wall so they don’t move.
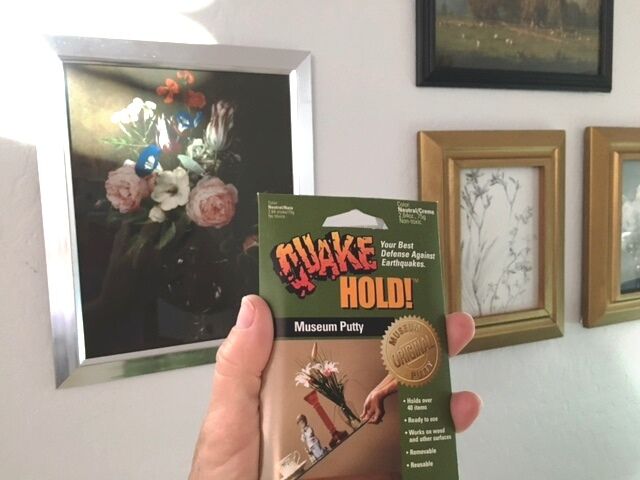
All my pictures are cockeyed half the time and I bought it to remedy that but never did it.
It turned out so well, everything hanging in my house is going to get a little Quake Hold.
Now I need to figure out how to get lampshades from moving around. Ideas?
Wrap Up
My bedroom still needs some fresh artwork, so I’ll be keeping an eye out, but you can bet it will be budget.
Have a wonderful weekend!
Corine, does that quake hold hurt the walls?
No, nor does it damage furniture. It is great!