
Taking you along on our project journeys is one of my favorite things to do. And we finally have a big, fat project we can all sink our teeth into.
We added a pergola!
Why We Finally Decided to Add a Pergola
For years I resisted adding a pergola to our Arizona backyard.
Not because I didn’t love the look — I absolutely did — but because our patio already stays fairly dark in the winter and I worried adding more overhead coverage would make it even darker.
But after another summer of crowding every chair, plant and guest under one small covered corner of the patio, I finally admitted something had to change.
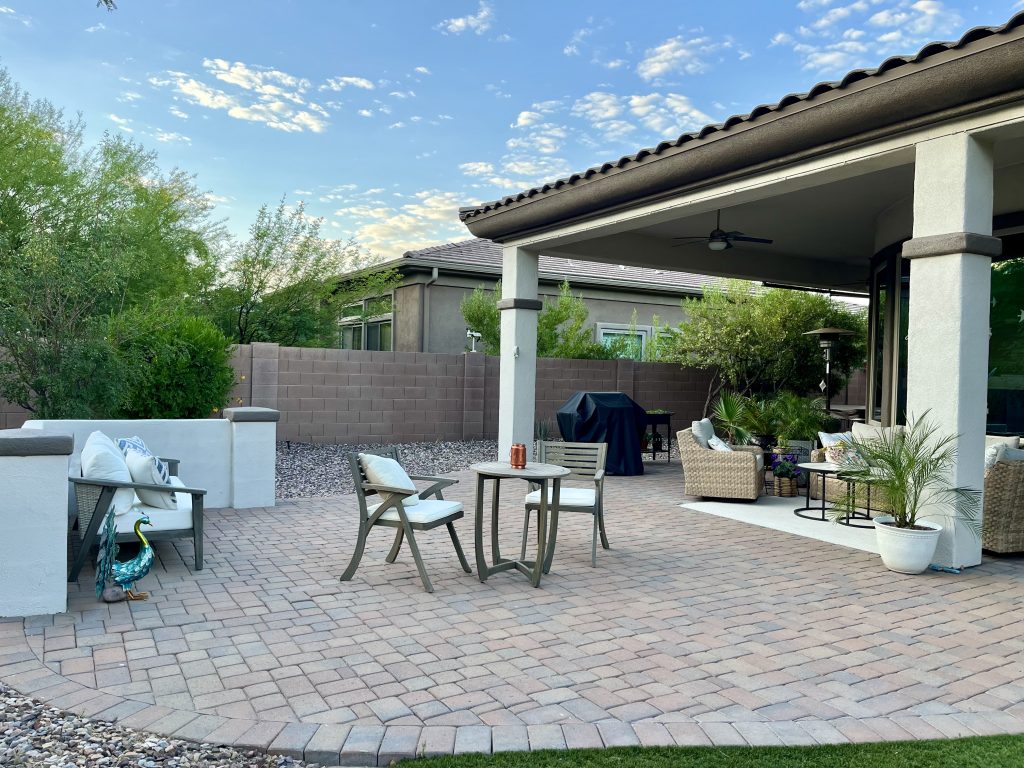
Our Patio Before the Pergola
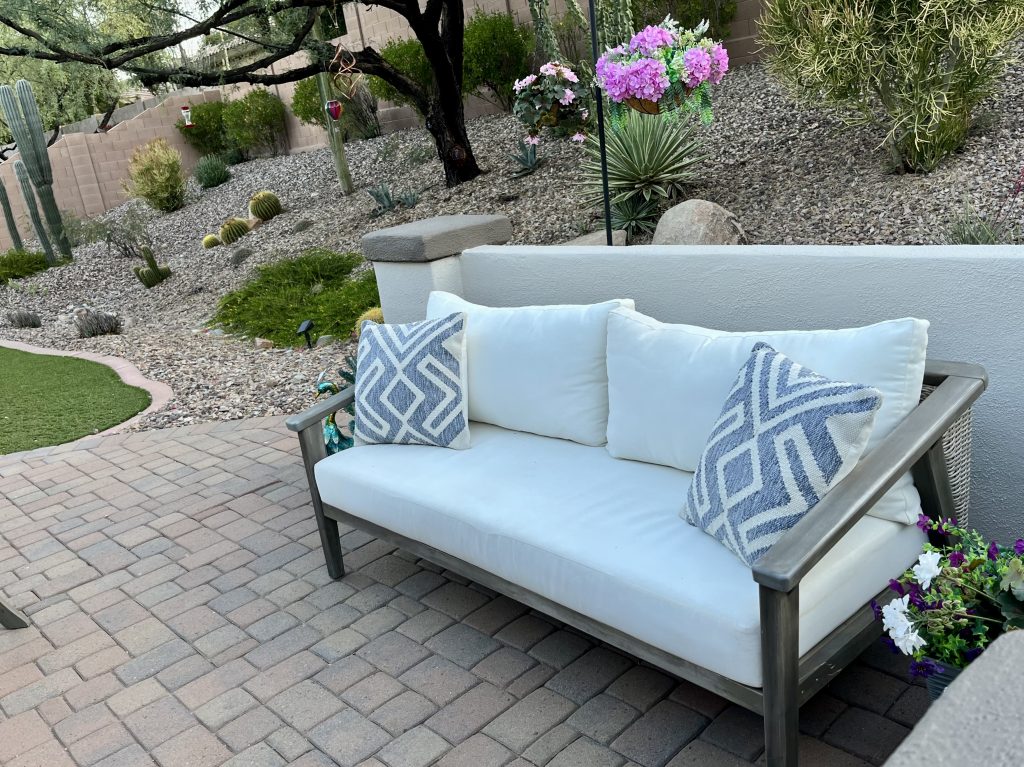
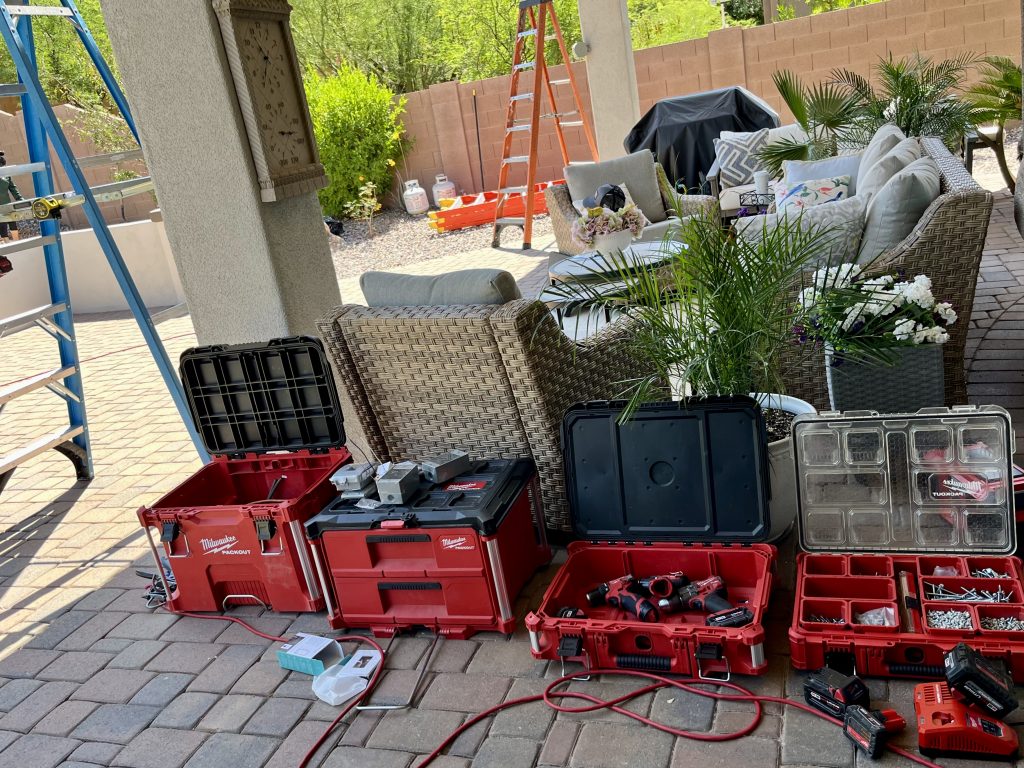
Here is a picture of our patio and our furniture before the pergola. I still love the BHG furniture we got and I am out there every chance I get, but you can see, the transition was very awkward.
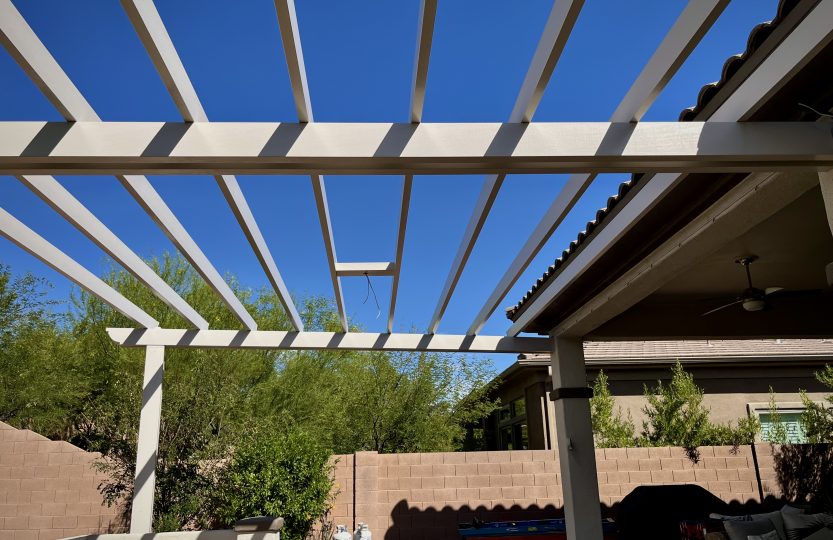
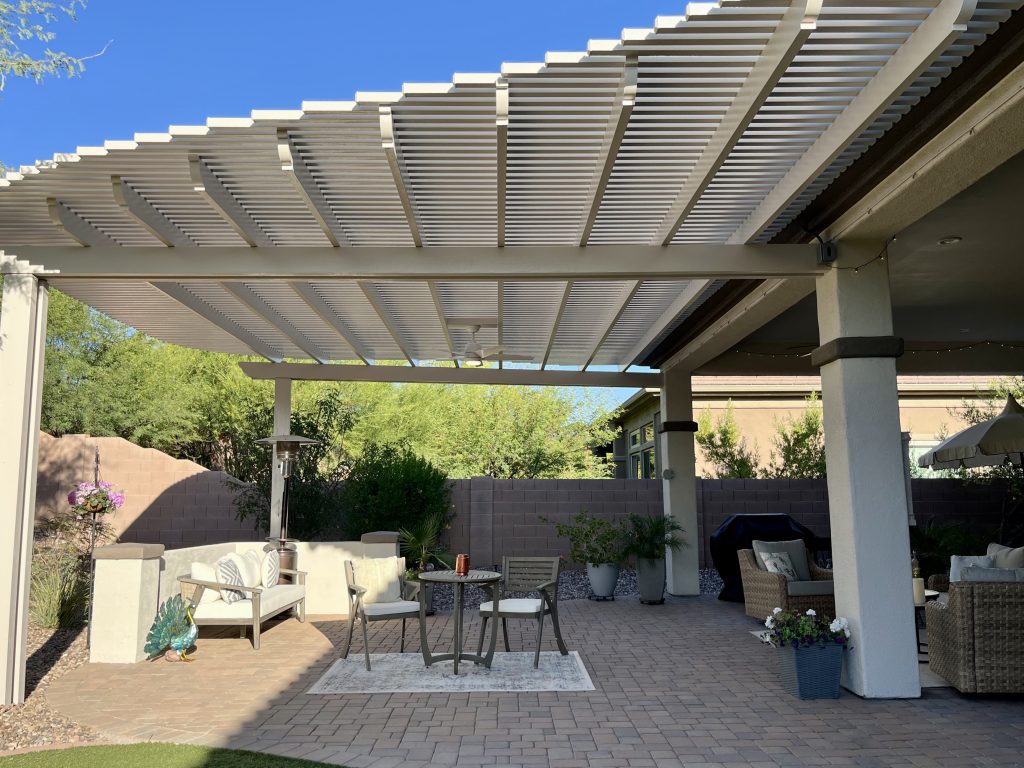
Once the first beams went up, we immediately realized how much more intentional the patio looked. Even unfinished, the space already felt more like an outdoor room instead of a giant open slab of pavers.
Planning the Pergola Design
Advantage Brands came very highly recommended by friends and by our landscaper. Using them as our vendor was an easy choice.
We opted for the color Desert Sand which is an exact match to our house and keeps the backyard bright and pretty.
The material, according to our quote:
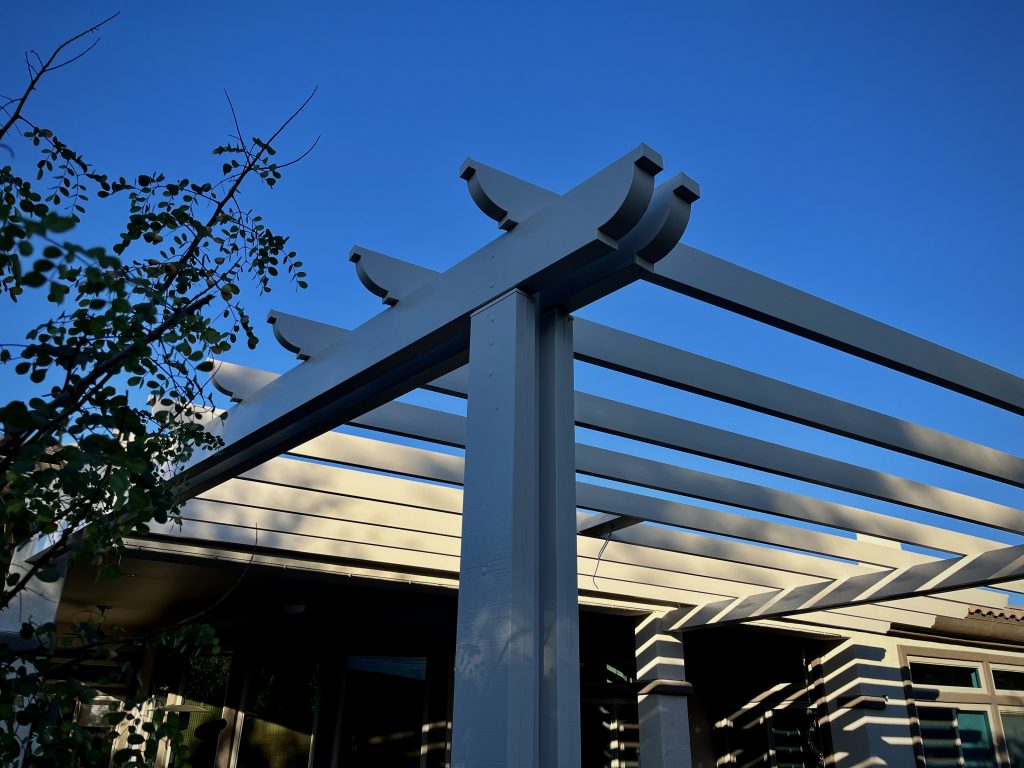
The material itself is thick gauge aluminum designed to never rust, rot, peel, corrode, chip or warp. Maintenance-free, these covers are designed to withstand the tests of time and give the much-desired shade we all seek. The lattice tubes which are 2″ x 2″ with a 2″ spacing to give ~65% shade for everything underneath when at high noon with more shade and even full shade at other times of the day.
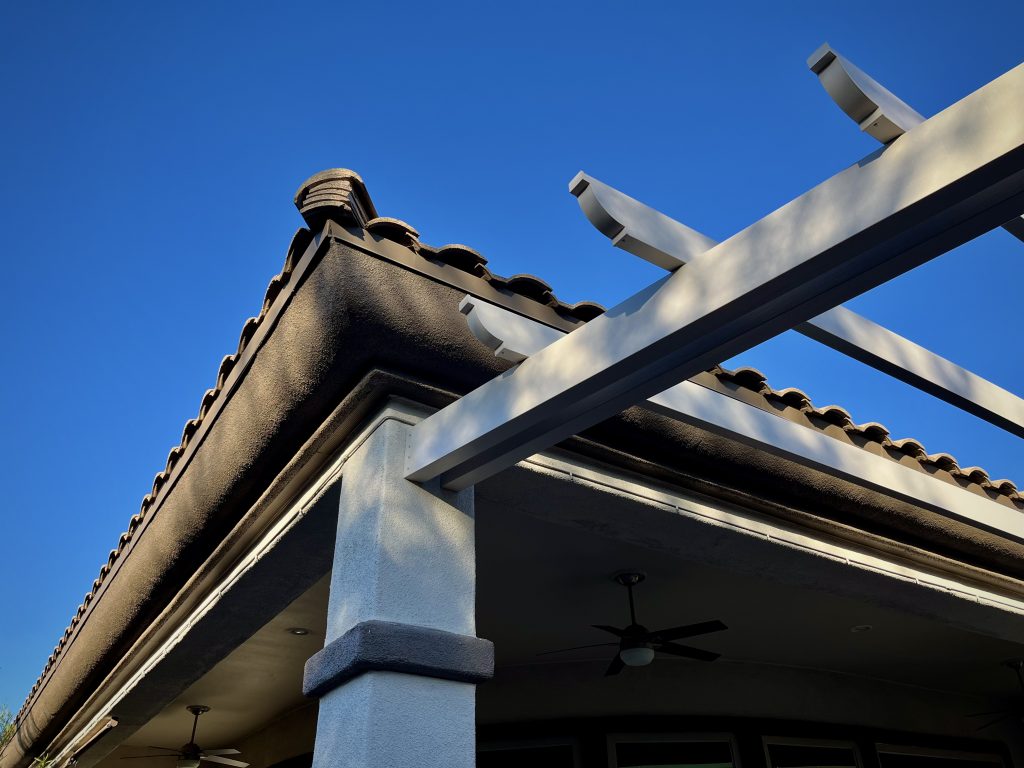
The pergola naturally attaches to our existing pillars and is supported on the other side by sturdy pillars embedded into concrete.
We chose a lattice cover rather than a solid roof to provide shade in the summer and let in as much light as possible in the winter.
Questions We Asked Before Building
- Will it darken the house interior?
- So far, there is no darkening this time of year. I believe it will be minimal in the winter as well.
- How much shade will it actually provide?
- The east rising sun and west setting sun will still access our patio, just as it did under our patio cover, but it’s much improved. We were quoted a 65% reduction in sun at high noon and greater reduction the rest of the day.
- There is an option to add shades to the side to keep out more sun, but we didn’t feel that necessary.
- The east rising sun and west setting sun will still access our patio, just as it did under our patio cover, but it’s much improved. We were quoted a 65% reduction in sun at high noon and greater reduction the rest of the day.
- Does it need HOA approval?
- It surely does! Advantage Brands has worked in Anthem for years and has a good relationship with our HOA. They submitted the exact paperwork we need which we emailed to the HOA and received approval within two weeks.
- Does it match the home architecture?
- Our new pergola follows the curvature of our patio and the end caps we chose match our rounded roof.
Lead Time & Installation Timeline
We met with Patrick from Advantage for the first time on April 8th. Our pergola was completed on May 14th. Not bad, right?
Here’s the breakdown:
- The quote took about 2 weeks to process, approve and receive the HOA submittal.
- The HOA approves only one day a week, so though we submitted early in the week, the committee met on Friday and we received the approval in the mail the next week. I’m calling this 2 weeks as well.
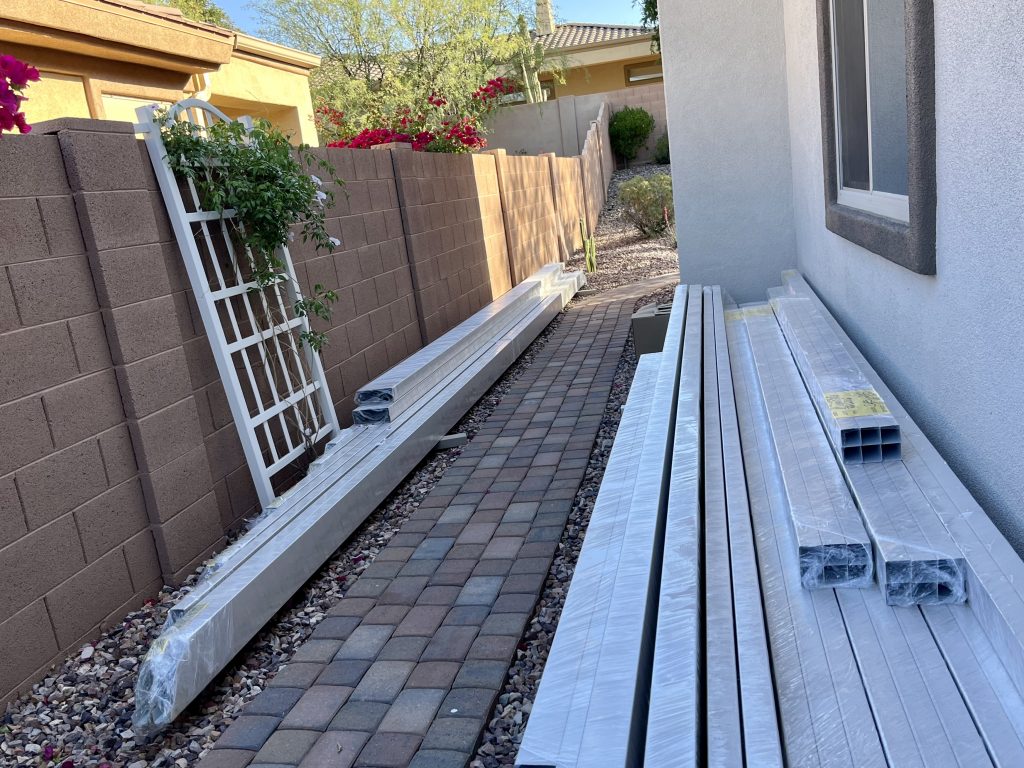
- As soon as we made our first (out of three) instalment payments, the material was ordered. The material arrived April 27th and was stacked on the side of our house.
- We had a fuzzy installation date, but weren’t sure until the week of May 5th that the team would be here the next Tuesday.
- Running electricity for a fan was an extra option and we hired an electrician Patrick recommended.
Phase Time
| Initial quote | 1.5 weeks |
| HOA approval | 1.5 weeks |
| Material Delivery | 1 week |
| Installation start | 2 weeks |
| Installation complete | 3 days |
Our Backyard Pergola Budget
I don’t have an exact budget breakdown, but for our large area, the options ran right around $15K, including the $500 electrical package.
Considering the size of the structure and the amount of usable living space it added to our backyard, we feel it was a worthwhile investment for how much we use our patio throughout the year.
What We Love About It So Far
Ascetically it’s very pretty. The lattice looks almost delicate and the color is such a great match to our house, it looks like it’s always been there.
Having a sense of cohesion instead of a big empty hot space makes a big difference.
Would We Add a Pergola Again?
Absolutely.
For us, the biggest improvement wasn’t just the additional shade — it was how much more functional the entire patio became. We can finally spread furniture out, create separate seating zones and actually enjoy the full paved area instead of crowding everyone under the covered patio.
Wrap Up
Here is a sneak peek at the initial patio put back together, but I’ll follow up on this long post later and let you know our final thoughts and any surprises we encounter.
Finally! A large and fairly sexy (in my opinion!) project to discuss. It’s been awhile.
If you’re interested in some of our other home improvement projects you can check out:
Converting the Home Office into a Man Cave
Wow! What a difference, You guys are going to enjoy that so much. Well worth the investment. You will wonder why didn’t do it years ago.
I love it! Thank you
Corine, I thought your patio was very pretty and inviting before but this added pergola is a perfect addition. Like you said it gives you more entertaining space with shade.
Thank you!